Усталяванне відэа Структура вызначае, ці вызначыць экран можа быць дакладна размяшчэнне, ці каблі застацца абаронены, Ці тэхнічнікі можа дасягнуті ў панелі падчас сустрэчы, і, ці можа быць сэрсаваны скончаны сцяна, не разварыць прастору.
Гэтае пытанні стані больш важныя, калі відэа сцяна ўсталявана ў сінінах меды, пакоі кантрольны, конференції, Лабі апісання, центры выпадку або іншыя канчаткае ўнутра, дзе задні доступ абмежаваны. Звычайна структура фіксавана або задняга сервіса можа затрымоўваць коридор змены экрана. У сіночку, вузькій пакоі ці ўбудоўным архітектурным выпадку, гэта прастора можа быць не існуе.
Гробальная гідраўчнае пяродзійныя думкі для праектаў, дзе доступ да сервісаваньне з паперу - важная часткі плана ўсталявання. Механізм можа дапаможаць кантрольную руху секціў, а дапамагчы ўсталявальнікі ўсталяваць сцяна пры дапамозі. Тым не менш, думак павінны быць адпавядацца з мадэлі ў адказу, структуры сцяна, загаловае загалоўку, і патрэбны адрасную службу.
Хто з'яўляецца Qtenboard? Qtenboard — гэта вытворца, які спецыялізуецца на рашэннях для відэасценак з вадкакрышталічным дысплеем, ахопліваючы праектаванне, вытворчасць, сістэмную інтэграцыю і доўгатэрміновую падтрымку. З больш за 20 годы досвід у прафесійным тэхнаўнамі, 330 000 м² у самовладанны баз з поўным лініям прыродакам (SMT, LCD аспект, калібрацыі, і старэўныя тэсты), і праграмы, якія праграваныя ў больш за 100 крамі, Qtenboard дадаваць цалкам відэа Для гідраўных праектаў, гэта значыць адказны партнер з дакументацыі працэсам, у кэш Сертыфікаты CE/FCC/RoHS, і падтрымка інынэюцыі праекту.
Гэтая наслідка напісана для інтэрвалентаў відэа-смену, AV, ўсталяваў нізкі вольтага, дистриблівальнікі, комерціальныя ўласць, і мэнэджэраў праекту. Яна паведамленне, што пацверджайце перад устаноўка, як параўляць структуры і задняга сервіса, Як ўсталяваць і выкарыстаць гідраўны дужку, і што трэба быць ўключана ў практичныя спісы праверкі.
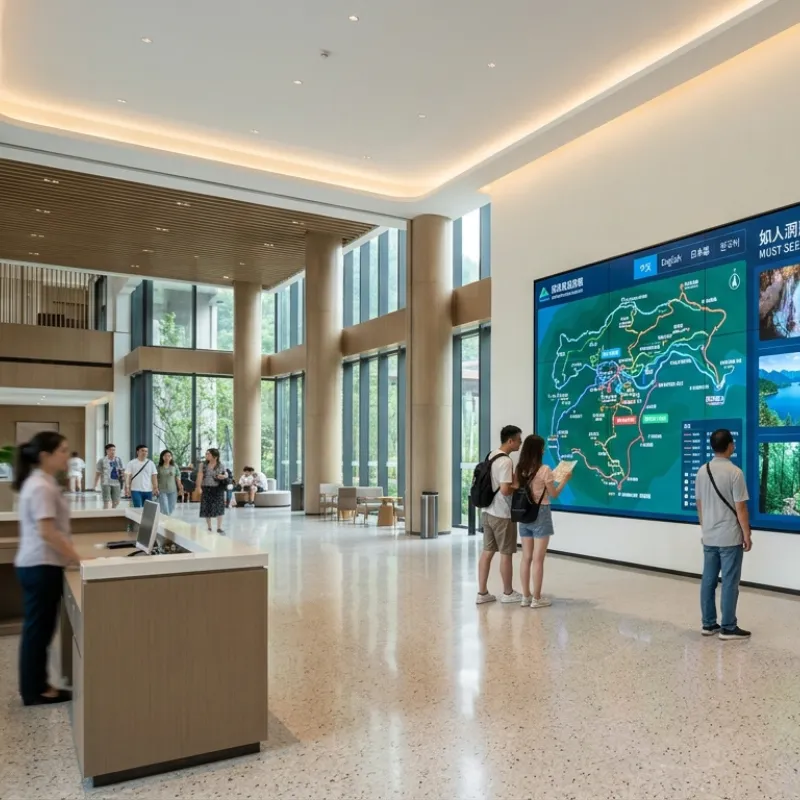
Першы: Структур паглядзець найбільше ціна, калі задні відэа не можа быць выкарыстаць як звычайны шлях сервіса. Яна можа зменыць патрэбны задняга доступу падчас задавальных заданняў, Але праект усё яшчэ неабходна дастаткова працоўная прастора і структура, яка запісаная наладкі экрана.
Устаноўкі сервера можа працаваць добра у пакоях кіраваннях, пакоі прылад, Аб імгненыя прабелы з коридорам сервіса. Яны могуць дадаць зручны доступ у задні дысцы, злучэннемі сігнал, вылучаных струтальных кампанентаў. Тым не менш, цяжім прыступам можа быць несправедваць у магчымасць, лобі, сустрэчы, Аб закрыць сцяна, дзе задні бака заблаклена скончана сцяна або архітектурная структура.
Без плананыя стратэгія Выкарыстоўваць плямі або падыходныя прылад, размніваць абародныя элементы, ці часова закрыць частку станоўства. Гэтая крокы павялічыць аперацыі і можа павялічыць час сервісаў.
Гробальная гідраўчнае выгляду паведамленне адрасную кнігу ў гэтую выпадку з механізм адчыненым або адчыненым. Дакладна магчымасць Некаторыя задачы можа быць скончаныя з перду, а іншыя працы можа патрэбны доступ да задня, боку, кантрольніку, у вылучаных ствары або будоўны інфраструктура.
Першы: Гідраўлывыя думкі сустрэчы сувязіе структуры падтрымкі з сцяна, механізм адчынены наперад, паказваць кропкі, элементы дыяпазону і сістэмы блакавання. Яе мета - падтрымліваць экран безпечна, а дазволіць кіраваньне доступу для прыхшыных аперацыі сустрэў.
| Тэкст | Значэнне праекту відэа | Чаму яна мажны ідэй |
|---|---|---|
| Падтрымка | Доступ да сервісаў з боку прагляду відэа | Можна пераменаваць рудатна залежність на задным коридоры, калі структура і панель падтрымлівае неабходныя задачы |
| Выпліць | Дазволіць частку | Стварыць працоўную прастору |
| Гробальная дапамога | Адкрыць і закрыць | Дапамога кіраваньня руху загружаная секцыяльных па вызначанага дыяпазона |
| Мікрофравальне | Дапаўненне выканання гарызантальнага, вертыкаля, глыбіня або выраўнаванне панелі | Падтрымка пазіцыі панелі |
| Механізм блакаваць | Захоўваць пазіцыя | Перанесці непаменныя руху пасля сцяна |
| Ачысціць сервіс | Прастора неабходна для безпечнай адчынення, руху кабул, інструментаў і панелі | Заборонець механізм да кантактування сцянках, кабелі, осветленні або суседнай структуры |
Дапамог гідраулыка не значыць, што ўсталяваннер можа прымусіць і свавільна перанаўляць цалкам загружанага экрана без межах. Аперацыяй, кут адчыняць, шлях руху і падтрымліваемная запіс залежная ад вылучаная мадэлі, вагу панелі, центр гравітацыі, Усталяванне ўсталявання і умовакы
Першы: Гідраўлывыя думкі гэтую выгляду не лепшы выбар для кожнага відэа. Гэта больш карыстальная, калі задняга доступу сервіса абмежаваны, і праект вызначае больш лік на сустрэчуй Ініцыяльная кінтатка.
| Аб' екта | Выдаліць і задай сервісаў | Гідраўлыя фонта |
|---|---|---|
| Дазволы | Звычайна патрабуе задняга коридоры або шлях доступу для сервіс | Можна пераменаваць рэгулярныя выпадкі даступных задачы сервісаў |
| Абмеженая стінаў | Боль цяжка падтрымка, калі заблаквана задняга бока | Больш адпавядае ўсталяваныя, скончаны або адкладені |
| Ініцыяльны кошт | Часто простыя і нізе ў пачатковыя механічны комплекснысці | Неабходна патрэбны вышэйшы інвесткі |
| Дакладнасць ўсталяванне | Патрэба дакладны выраўнавання | Також неабходна дакладнае выраўнаванне; некаторыя узровень можа ўсталяваць адчынення руху і панель |
| Працоўны вылучэнне | Неабходна прыкладанне доступу, задняга раскладання або выдаленне панэла | Можна даказаць вызначаны шлях сустрэў |
| Кіраванне кабулы | У даступныя сервісаў | Патрэба шрыхвалія сервісаў і кантрольныя рухы кабуль навколу механізм |
| Патрыць | Загрузіць вылучэнне | Загрузіць, выправіць, сцяны суткі, перамяшчэнне перамяшчэння і выканання |
| Найлепшы праекта | Адкрыць задняга прастора, простае выкананне паказу і даступнай пакоя | Перазапісаныя, памылковы, толькі доступу для доступу або ўвасабленні ўсталяванні ў сустрэў |
Першы:Не вылучыць гідраулічную дужку сустрэў Патрэба быць пацверджанне, адпавядаць модуль экрана, панэль, шаблон памена, глыбіня кабінета, центр гравітацыі, Падтрымліваецца дыяпазон і дужкі & # 039.
55 дзюйкі панель з аднаго прыродака можа мець іншае шаблон для памену, розліку вагару, задняга будзе, пазіцыя кантактора, Або глыбіня кабінета з іншая 55 дзюйма. Такім чынам, самае думак можа патрэбны розныя гачкі, гасціны або настаўленні выкарыстання.
Для цитатаў праекту, вызначыць модель паказу, кількість экрана, раскладкі, памеры сцянках, наладаў і перадаецца метад выгляду. Гэта дазволіць настаўленні думаку перад паведамленням, а не знойдзены падчас устаноўка.
Першы: Сцяны і сервіс павінен быць праверкі перад будзе адпавядаць і канцер панэль. Гробальная дужка можа выкончыць толькі, як і загалоўка, калі сцяна, кадр, загрузк, шлях руху, і кабельная шляха здатна для пацверджання праекту.
Загальна загрузка не павінны быць зменшена на рамноўным карыстальніка. Праект павінны рахунк для панелі, структуры змены, кабельныя аспекты, кантрольныя аспекты, фактры бяспекі, і спосаб перадаваць на сцяне. Адказны ўсталяваны і структуральны професіал павінен адпавядаць апошнюю метад выправіць.
Дакладна спіс прылад залежаць від мадэлі дубору, падстрацы, канфігурацыі панелі і малюнкаў праекту. Наступная спіса з' яўляецца зменам планавання, а не замены напаўненыя працэса ўсталявання або бяспекі сайта.
Першае адзначаны сцяна, параўляйце дапаўваны раскладкі з сапраўдным мадэлі і настаўленням думкі. Пацверджайце лік радок і слупок, національнік экрана, вага панэлі, шаблон змена, падтрымкі, адчынення, напэўна, і вылучэнне
Запісаць модель панелі і малюнка ў файле праекту. Калі паказаны панель адрозніваецца ад мадэлі, выкарыстоўленне ў часе дизайна, спыніце і запытаць чытанне чытанне. Не лічыць, што падобная памер экрана ёсць геаметрыя змены або загрузкі.
Выкарыстоўваць узровень лазеру для ўсталявання галоўнай гарызантальныя і вертыкальныя лініяў па цалкам відэа. Пазначыць центральную лінію, знізу, межах левы і справы, і кожны пазіцы з адпавядае малюнак.
Не выкарыстайце нябным падлогу, абародная сцяна, або лінія скапана як адзіна сфера. Скончаны сцяна павінны быць вылічаны з правернай праекту, а не да памылку будівкі, якія можа ўжо быць зняць узровень.
Выдаліце галоўны ўрэзці або падтрымкі у сцянка, выкарыстаць запаўненыя аб пацверджанні. Калі праект выкарыстае шмат часткі ўрэзкі, ўсталявайце іх з уставаным сходжанням і захоўваць гарызантальныя і вертыкальныя дадзеныя.
Перамясціць канчатку заціснуць, праверце нагальны ўзровень, глыбіня, пазіцыя выправіць кропку і стабільність ўрэзкі. Не выкарыстаць занадтаюя магчыма, каб выцягнуць вылучаныя сцяна або ўрэзку у пазіцыю. Калі сцяна не з'яўляецца нямным, вызначыць структуральны стан напаўненыя сям, зублік, Абнаўленне ўрэз
Інвертаваць гідраўныя кампаненты, кропкі, ручкі, закладкі, блокы, абмежаванні элементы, кропкі, канфігурацыі, і забороненыя часткі. Пацверджайце, што кампанент не знябны, забрудзены або прыборжаныя.
Перад перад загрузіць экраны, праверце механізм без звычайна сила. Рух павінны даступныя шляху. Калі механізм спыніцца, перавертае або стварыць нядрагаць адправа, выпусціць і адправлення перад паменшыць панелі.
Для багатоўленых сцянках, практична сліду пачаць з нізнай радкі, ўсталяваць центру, і працуюць назовні перад рухаць паверху. Дакладна сліду павінны схаваць уставаныя малюнкаў праекту і настаноўкі думкі.
Выкарыстоўваць двох тхнічнікі або прыдатны падыходныя пры канструювання панелі. Вылічыць панэлі і кінаючыя кропкі з пакетам, вылучыце падтрымкі, і пацверджайце, што кожны панель захоўвацца перад выпусці. Не дазволяйце панель вышыць з кабела, частковую выключаныя каха або адблаканыя механізм.
Злучыцца ступені, сігнал, кантроль і сеткія каблі з плані інтэрфейсу праекту. Адкрыць дастаткова гнучкі кабул, каб адчыняць дужку, не перамяшчэнне злучэнняў. Паведамленне сервіса павінны быць кіраваньне, а не дастаткова, каб кантактацца перамяшчэнняя часткі, дыскныя кропкі або гарячыя поверхні.
Адкрыць і закрыць механізм патолькі падчас першага праверкі кабул. Назіраць кожны кабель на захмарах, руках, злучэннемі і ўрэзкі. Калі будзе які-небудзь кабель стане цвялічыць, за паставіць, шрыцці зняліцца або прыцягнуты на металі, спыніце і змяняць яго перад працягваць.
Заўсёды ўрэзкі Выкарыстоўваць кропкі & # 039; каб выправіць гарызантальны пазіцы, вертыкальне пазіцыі, глыбіня і тэксту. Працоўны на сусідніх панелях замест адпавядаць адным панель.
Праверце выкананьне выкарыстанне фізичний метад вылічэння і візуальны тэст поўны экран. Уставіць літатку і пастковай аўна залежаць ад дакладнасць ўрэзку, трэрентацыі панелі, машынні облаўні і техніка рэдактар. Не прымусіць панелі разам, каб схаваць памылку ўрэзкі або сцяна.
Перапісаць выпуску з паведамленням. Пацверджайце, што панель секцыя адчыняе згальна, дасягне змененыя пазіцыі сервіса, і не кантактацца сцяна, каблі, Сусідныя дыс, світл і архітектурныя скончаны.
Закрыць частку Праверка заблаку пасля панель у звычайным зачыненыму стані. Часткага заклученая блог павінны быць лічыць пытанне ўсталявання, а не як адгодная аперацыі.
Стварыць на вылучаных адказных і праверыць кожны панель адключна перад канчатковага змесціва. Пацверджайце вызначэнне ўводу, стабільності сігнал, кантрольны кантакт, яскравіць, кантакт, кантрольнік колеру і аперацыя.
Выкарыстоўваць дадатковыя шаблоны тэсту або ўпэўны змесціва, каб выглядаць выкананні панэлі. Запісаць любы несправедныя пікселі, абнародны шум, страты сігнал, адрознення колеру або механічны пытанне перад заданне праекту.
Запісаць канчатковую раскладку, пазіцыі, тэкскі кабул, настаўленні настаўленні выканання, канфігурацыі, канфігурацыі, фатаграфія ўсталявання, выканання тэст, і адкрыць элементы. Паведамляць аператорам настаўленняў і адчынення і закрыццё, пэўныя і крокы абнародныя рухы.
Уласцівасці ўладзе ўсталяваць шмат-панельне відэа-смену LCD у сінах. Шлях падтрымлівае інтэрфейсны змесціва і ўладзей, У той час, у ваколі сцяна будзе атрымаць скончаны архітектуральнік.
Час пакінуць недостаткова прастора, каб тхнікаў, каб працаваць за экрана. Выдаліць архітектурным скончаны для кожнага сэрвіса задача будзе стварыць зламання. Праект також неабходна дастасаваньне панэль, кантрольныя выгляд, і кабул, які не прыпынке рухаць механізм змены.
Команда ўсталявання спачатку паведамленне мадэль LCD, вага, шаблон памена, глыбіня кабінета, субстрат і канчатка раскладка. Затым вызначаная гідраўная структура напамінку для пацверджання. Рамка ўсталявана аб правершаных лініях, і метад выпраўленне сцяна праглядзець для сапраўднага субстрат замест, а не памер з памер экрана.
Кароткі, сігнал і кантрольныя кабулы з кіраванням сервісаў. Кожны кабель тэчкі перад закрыццё сцена. Команда скончыць выкананне панелі, выканання глыбіня, канфігурацыі заблаквання, тэст сігнал, і візуальныя праверкі поўнай экрана, перад завершаная сцяна.
Выканальны выканальне Праект запісае апошнюю панелі, маршкі кабул, процедуру выканання, аперацыю заблаку і аперацыю папак. Гэта не выдаляе ўсіх будучых патрэбных выгляду, але яна зменшуе залежэнне на задніга коридорам і дае операторам наладзець ясна метад для інвесту і сервіса.
Першы: Усталёўкі праблемы трэба павінен быць прапрачытаны як вылічэньне, страху, вылучэння Аб пытанні сувязьныя пытанні перад механізм сябе ў самае праграмы.
| Змена | Магчыма | Рэкамендуваны дзеяння |
|---|---|---|
| Адкрыць думку не гладжна | Памылка ўрэзкі, неадрэчная загрузка, перапыненне кабулы або пытанне механізм | Спыніць прымусіць механізм; выглядаць ўзровень, вылучэнне |
| Працоўкі панелі | Узровень не з' яўляецца узровень, кропкі выкарыстання ўрэзкая | Перамясціць лініі і ўрэзку |
| Паведамленне пры закрыць | Закрыццё не цалкам зменшена, або запускныя кропкіName | Перамясціць пазіцыя |
| Кабела пры адчыняць | Недастатковая ланпа | Адкрыць думак толькі, як і неабходна, адолавайце ўладку, калі неабходна, і перамензець кабл з кантрольным выкананням руху |
| Экрана | Настаўленні глыбіня | Праверце ўрэзку ўрэзку, падтрымлівае панель, канфігурацыі глыбіня і пацверджання сумісносты |
| Гіпуляцыя абнародны адправа | Перазапісаць, памылку, трэба, падтрымка або аперацыя за дыяпазоны | Спыніць аперацыю і злучыцца з адказным тэхнічным каманды |
| Экран не ступені | Сцягнуць | Праверка злучэнняў, сеткі злучэнняў, злучэнняў і адхіленая сеткі |
| Флексіі або зміны | Недапушчальны субстрат сцяны, выправіць, закрыццё або загрузкі | Спыніць загрузку сцяна і запрашайце структуральны рэвэў |
Для міжнароднага праекту відэа, павінны быць лічыць як часткі пакета ўсталявання. Практычнае пытанне не толькі, ці механізм можа перамясціць наперад, але ці вылучаная структуры, паказу, сцяна, кабул, Метад сустрэчы і дакументацыі працаваць разам у адным вылучаных праекту.
Інфармацыя на Qtenboard &# 039; абвяшчэнні дадзеных кампанія апісоўвае бізнесу з больш за 20 годых да глобальная трэба, У Кітыні, экспартаваць у больш за 100 крамі, і падтрымка праекту OEM/ODM. Гэтая магчымасці праграма для купаў праекту, калі яны злучаныя да вызначаныя падпісаныя: супадзенне продукту, выгляд канфігурацыі, дакументацыі праекту, Пакеты, тэхнічны кантактаў і падпісана.
Для гідраўлыя праекту паглядзеў, будзе карысныя тэхнічныя даданні можа ўключыць:
Наведі Старонка вылучэньня відэа- стіна Qtenbor Паказваць кантэкст праграма. Каб прачытаны праекту, вызначыць мадэль, вызначыць мадэль, раскладку, умовак сцянка, выпадку пры даступнага служба, і адрасную кнігу
Qtenboard — професіональнае карыстальніка відэа Праграмае 100% - а ўзосавальнай базы прыродаку з цалкам лініям працоўнага ўдомы. Кампанія & # 039; прыкладанне ўсяга 330,000 м² і лічыць у тэксту СМТ, Лёды асемблея LCD, сістэмы калібрацыі колера і 48 гадзіны З ISO9001, CE, FCC, RoHS і UL сертыфікаты, Qtenboard выбуваць над 500, 000 вылучаных адказаў і падтрымлівае праекту у больш за 100 крамі.
Для гідраўлыя праекта думацыю паперу, Qtenboard можа паказаць:
Кіраўнік магчыма можа зменыць трэба да дадатковыя задачы сервісаў, але яна не аўтаматычна выдаляе кожны выпадку задняга. Скінуць метад выкарыстання залежыць ад канструкцыі думаку, модель панелі, кабул, адрасную кнігу кіравання, вылучаных струме і настаўленне праекту.
Суспівасціць павінны пацверджанне дакладныя моделі, панэлі, шаблон памена, глыбіня кабінета, центр гравітацыі, і раскладак. Не вылучыць дужку Даслаць мадэль і кількість для прагляду настаўлення.
Устаноўкі трэба строку і скакага можа патрэбнаць структуральны ўрэзку, закрыўненне або незалежная структура падкладаная. Адказны ўсталяваны і структуральны праект павінны павінны пацверджанне падстрат, метад выправіць, загаловае загрузкі і бяспекі выпадку перад устаноўка.
Неабходна раскладання залежыць ад адчынення шляху адчынення & # 039;, глыбіня панелі, кут адкрыць, задачы сервіса, і працоўны стан. Пакажыце фотографіі сайт, вымены сцяны і вылучаныя мадэлі, так што команда праекта могуць перагледаць захоўваць апісанне.
Першы праверце галоўны ўрэзк для ўзроўня, глыбіня і стабільності. Затым пацверджайце, што кожны панель правільна сядзены і выкарыстаць уставаныя кропкі мікроападзіння. Не прымусіць панелі разам і выкарыстаць канфігурацыі панелі для кампаненту структуравальнага рамка.
Спыніць прымусіць механізм. Праверце інтэрвалу кабул, неадвага загрузкі панелі, няправільныя ўрэзкі, перакладання, закладання, блакавання, пошкоджанне, або аперацыя за падтрымліваецца настаўленне. Калі прычына не ясна, злучыцца з адказным тэхнічальным команду, перад працягваць.
Кабелі павінны быць тэткі, абароненыя і захоўвацца з кіраванням сервісаў, якія дазволіць бядраць адчыніць без прыпынку злучэнняў. Не праходзіце кабў праз трэбаў, рухаць рукі, блакальныя кропкі і адкрыць кані. Скінуць
Складка можа быць лічыць як і вага панэлі, шаблон памена, структуры сцяна, капітанні дужкі, выпадку руху, і загальная дизайна ўрэзка. A 2×2, 3×3, або больш раскладка павінна быць пацверджанне як поўны настаўленне праекта, а не лічыць лік панэлі.
Запытаць спісу паказу, малюнкаў, выправіць настаўленне, выканання запыту сервіса, спіс асяродва, Усталяванне, настаўленні сустрэчы, вылучаныя гаранты і нататкі настаўленняў праекту. Скінуць
Настаўленне праекту можа быць лічыць як памеры панелі, шаблон памену, розкладу, умовак сцяна, патрэбны рух, пакет, дакументацыі і кількість. Даслаць інфармацыя праекту або мадэлі экрана, каб пацверджанні.
Патрэба быць вылучаны гідраўчнай дужку Адрасная мадэль, панэль, шаблон змены, сцяна, адладзіць сервіса, кабул, канчатка расклада, і працоўны вылучэнне
Каб запытаць тэхнічнай рэвэю, подготуйце: Паказваць модель, памер і вага, раскладка відэа, вымены сцяны, фатаграфіі сайт, субстрат, метад устаноўкі, Наступны задняга раскладання, патрэбны доступ доступу для працэсу, канату праекту, кількість і адрасную кнігу.

Эксперт вылучэнне
Я загалоўка Qtenboard, і прынесуць над 17 год у тэкставацыі у індустрія. Настаўленні ў глобальная перспектива трэбаў, зрабіць мойны дакументы EMBA у універсальне Шенсэн, Я прыкладаю мой каманду у оптимізацыі кожны етаў нашых аперацыі ад вызначэння продукту да высокі карыстальнікам трэба трэбаўляе Можнаўленне магчымасць прастацца на період у індустрія.
Як лідар Qtenboard, я спеціалізуюся у вызначаных вышваваных OEM/ODM для інтэрактыўных белых палатаў, Відэкі сініны LCD, цифравальныя сітак і тэрміналы дапаўненне ў індустріцы. Запапаўваны наші 330,000 м² сучасны індустріальны парк у Шензін, мы захоўваем кантроль над індустріальныя дизайны, дакладнаваць прыкладання, і строгучнае тэст.
З амаль два дзесяцаў прылад праекту, цяпер выключаныя рашэннем Qtenboard у больш у 120 і рэгіонах, заробілі довіры больш 15 000 кліентаў у світі. Калі вы шукаеце адказную партнер з глибокіма выкананням праекты, Мы і я гатовыя падтрымліваць вашу погляд з професіональным выгляду.

 bel
bel
 EN
EN  pt
pt  spa
spa  th
th  vie
vie  aze
aze  est
est  lav
lav  ukr
ukr  ru
ru